

When designing a kitchen, many homeowners instinctively turn to eye-catching backsplashes or statement lighting. But the truth is, real visual impact often comes from cabinetry, and done thoughtfully, it can tie the entire space together in a way that feels intentional, luxurious, and uniquely yours.
The secret? A single focal-point cabinet that provides direction, balance, and character, without overpowering the design. Here’s how to create a stunning focal point using cabinets as your canvas.
Why Cabinets Make Naturally Powerful Focal Points
A Large, Central Visual Canvas
Cabinets dominate the kitchen’s visual real estate. Whether tall, full-height units or island runs with base cabinets, they offer an ideal surface for creating an anchor that draws the eye.
Texture & Tone as Design Tools
Unlike tile or stone, cabinets can be stained, painted, or veneered with textures like burl wood, dramatic knuckles, or matte lacquer. That kind of depth captures attention and adds personality.
Permanent Yet Subtle Influence
A standout cabinet is a lasting feature, unlike lighting or accessories, it’s integrated into the kitchen’s structure. But it can still feel grounded and harmonious, not overpowering.
Step 1: Choose the Right Cabinet to Feature
Placement Strategy
- Tall/mid-height units near the cooking zone or fridge command attention.
- End-of-run pieces visible from the entry or adjacent room give natural balance.
- Island cabinetry, particularly elevated sections, can serve as standalone accents.
Vertical Designs Work Best
Tall cabinets anchor the eye vertically, shaping how you move through the space. Even a single towering accent can reshape kitchen flow visually.
Step 2: Choose a Statement Finish That Pops
Bold Wood Grain
Unusual grains like zebrawood, walnut burl, or cathedral oak offer warmth and depth. A wood-tone accent cabinet adds visual richness while blending with neutral surroundings.
Rich Paint or Lacquer
Deep hues like navy, charcoal, or forest green add drama without feeling trendy when contrasted with neutral matte finishes.
Mixed Materials
Combining wood and matte-painted doors or integrating glass-front panels can add variety while keeping the focus subtle.
Step 3: Frame Your Focal Cabinet for Harmony
Surround It with Neutrals
Matte whites, soft grays, or creamy hues are ideal companions. They provide balance and prevent the focal feature from overwhelming the space.
Anchor the Look
Match the wood tone or finish to the island, trim, or architectural accents. Doing so makes the focal cabinet feel intentional, not out of place.
Tone-Down Hardware
Keep hardware simple and unobtrusive on statement cabinets. Let finish and texture do the talking.
Step 4: Use Placement & Lighting to Elevate Impact
Location is Everything
Place the focal cabinet within your primary sightlines, perhaps a view from the dining table or kitchen entrance. It should feel like a visual arrival point in the space.
Lighting Enhances Tone
Install under-cabinet or crown lighting to highlight the grain or finish. Illuminated open shelving flanking the focal unit adds layers without competing.
Avoid Visual Overload
Limit other cabinetry accents in bold tones. One cabinet is enough, multiple storybook-style features can cause imbalance and visual fatigue.
Step 5: Achieve the Look Without a Full Remodel
Door Replacement or Refacing
No need to tear everything out. Reface one cabinet with a new shaker door in wood veneer or replace selected doors with slab or glass fronts.
Peel-and-Stick Veneers
Innovative and cost-effective, wood grain or matte finishes can be applied directly over existing cabinetry to create drama on a single piece.
Open Shelving Accents
If replacing cabinets isn’t possible, add open shelves in wood or metal beside a neutral focal cabinet. They echo texture and tie into broader design.
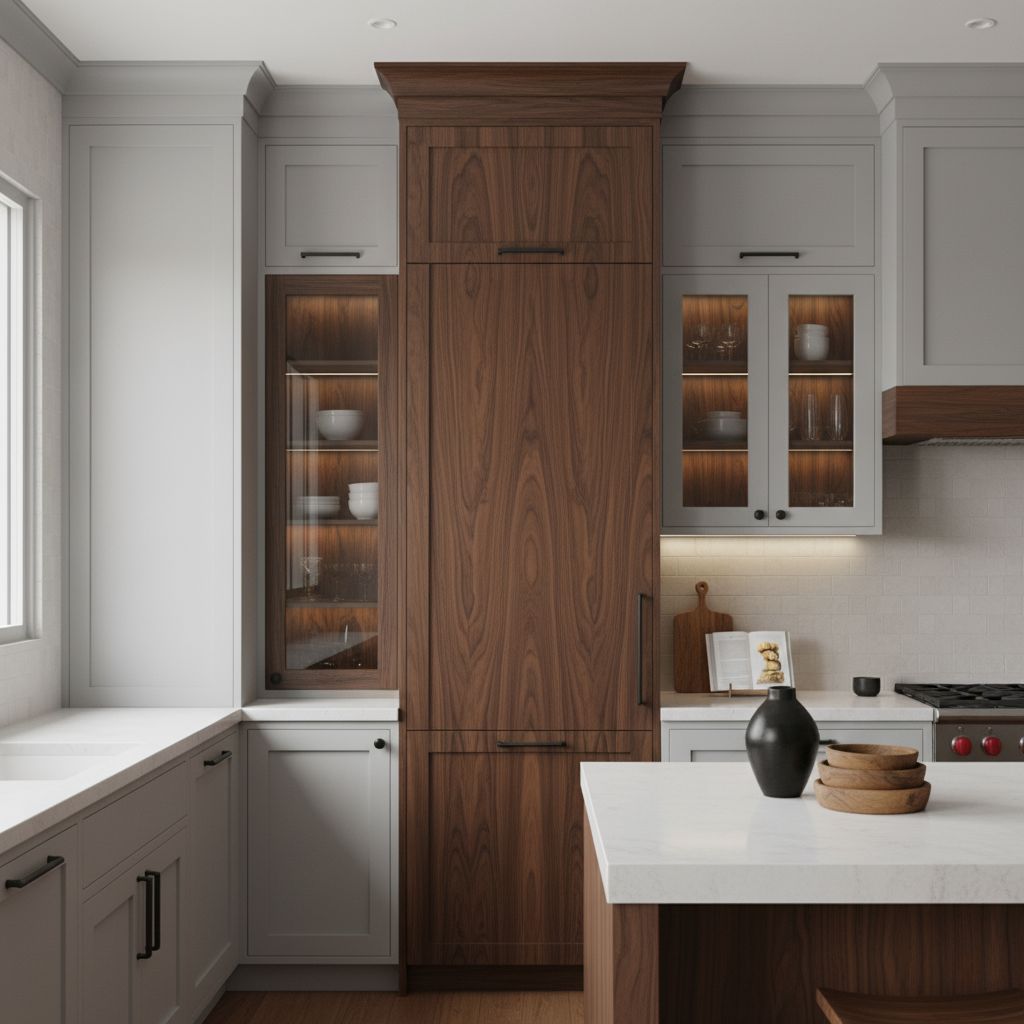
Real-Life Case Study: One Cabinet That Shifted the Space
In a recent project, a client’s kitchen felt flat after installation. We suggested a single vertical focal cabinet at the eye-catching end of the run, finished in bold walnut veneer. We surrounded it with soft white matte cabinets and matched the wood tone on the island face. The result was immediate:
- The cabinetry became a visual anchor with direction across the kitchen.
- The contrast made the rest of the cabinetry appear more refined and intentional.
- Homeowners said the space “felt elevated”, more like a magazine shoot than a remodel.
It didn’t require a full reno, just smart placement and cohesive finishes.
Step 6: Keep the Design Cohesive
Bring in Complementary Elements
Introduce accessories that echo the focal finish: wood cutting boards, woven baskets, or copper accents to reinforce unity.
Continue the Grain Elsewhere
Even minor accents like open shelving, pendant supports, or barstool seats in matching wood tie back to the focal piece.
Stick with a Clear Palette
Limit the design to 2–3 key tones, neutral foundation, focal accent, and one coordinating finish for hardware or trim.
Why One Cabinet Makes a Bigger Statement Than You Think
Small Change, Big Impact
A single standout piece rewrites visual hierarchy. It’s a sophisticated, practical way to add architectural flair without a full-scale remodel.
Cost-Efficient Upgrade
Targeted updates mean less expense and minimal disruption. Budget that was intended for a backsplash or decorative tile can instead elevate your cabinetry and add years of influence.
Captures Attention & Adds Value
A distinctive focal point implies intentional design and craftsmanship, key elements that homebuyers and visitors respond to, even subconsciously.
Final Thoughts on Creating Focal Cabinetry
- Pick one dominant unit, tall or mid-height, for uninterrupted impact.
- Use rich finishes that contrast yet complement surrounding cabinets.
- Frame wisely with neutrals, lighting, and balanced hardware.
- Repeat tones elsewhere for cohesion.
Target strategically, you don’t need to redo the whole kitchen.